Install Nextcloud on Unraid

Introduction to Nextcloud
Nextcloud is a versatile and secure open-source software platform for file hosting and sharing, which offers a variety of productivity tools and collaborative features. It stands out as a popular choice for individuals and organizations seeking a private cloud solution. Nextcloud's ability to be self-hosted gives users full control over their data, ensuring privacy and customization according to specific needs.
Key Features and Capabilities of Nextcloud
- File Access and Synchronization: Seamlessly access, sync, and share files across various devices.
- Collaboration Tools: Integrated office suite for document editing, calendar, and contact management.
- Communication Features: Built-in chat and video conferencing for effective team collaboration.
- Security and Privacy: End-to-end encryption ensures data security and confidentiality.
- Customization and Extensibility: Extensive app ecosystem for adding new functionalities.
- User and Group Management: Easy management of users and permissions.
- Cross-Platform Compatibility: Supports Windows, macOS, Linux, iOS, and Android.
- Activity Tracking and Notifications: Keeps track of changes and updates in real-time.
Advantages of Self-Hosting Nextcloud
- Data Sovereignty: Full control over where and how your data is stored.
- Customizability: Tailor Nextcloud to meet specific needs and preferences.
- Privacy Assurance: Enhanced privacy, as data is stored on your own server.
- Cost-Effective: Avoid the recurring costs associated with commercial cloud services.
- Integration Capabilities: Easily integrate with existing infrastructure and services.
- Community Support: Access to a vibrant community for support and development.
- Compliance and Standards: Easier to comply with local data protection regulations.
- No Vendor Lock-in: Freedom from reliance on third-party cloud providers.
By self-hosting Nextcloud, users can achieve a balance between functionality, privacy, and control, making it an excellent choice for personal or business use.
Step-by-Step Installation Guide
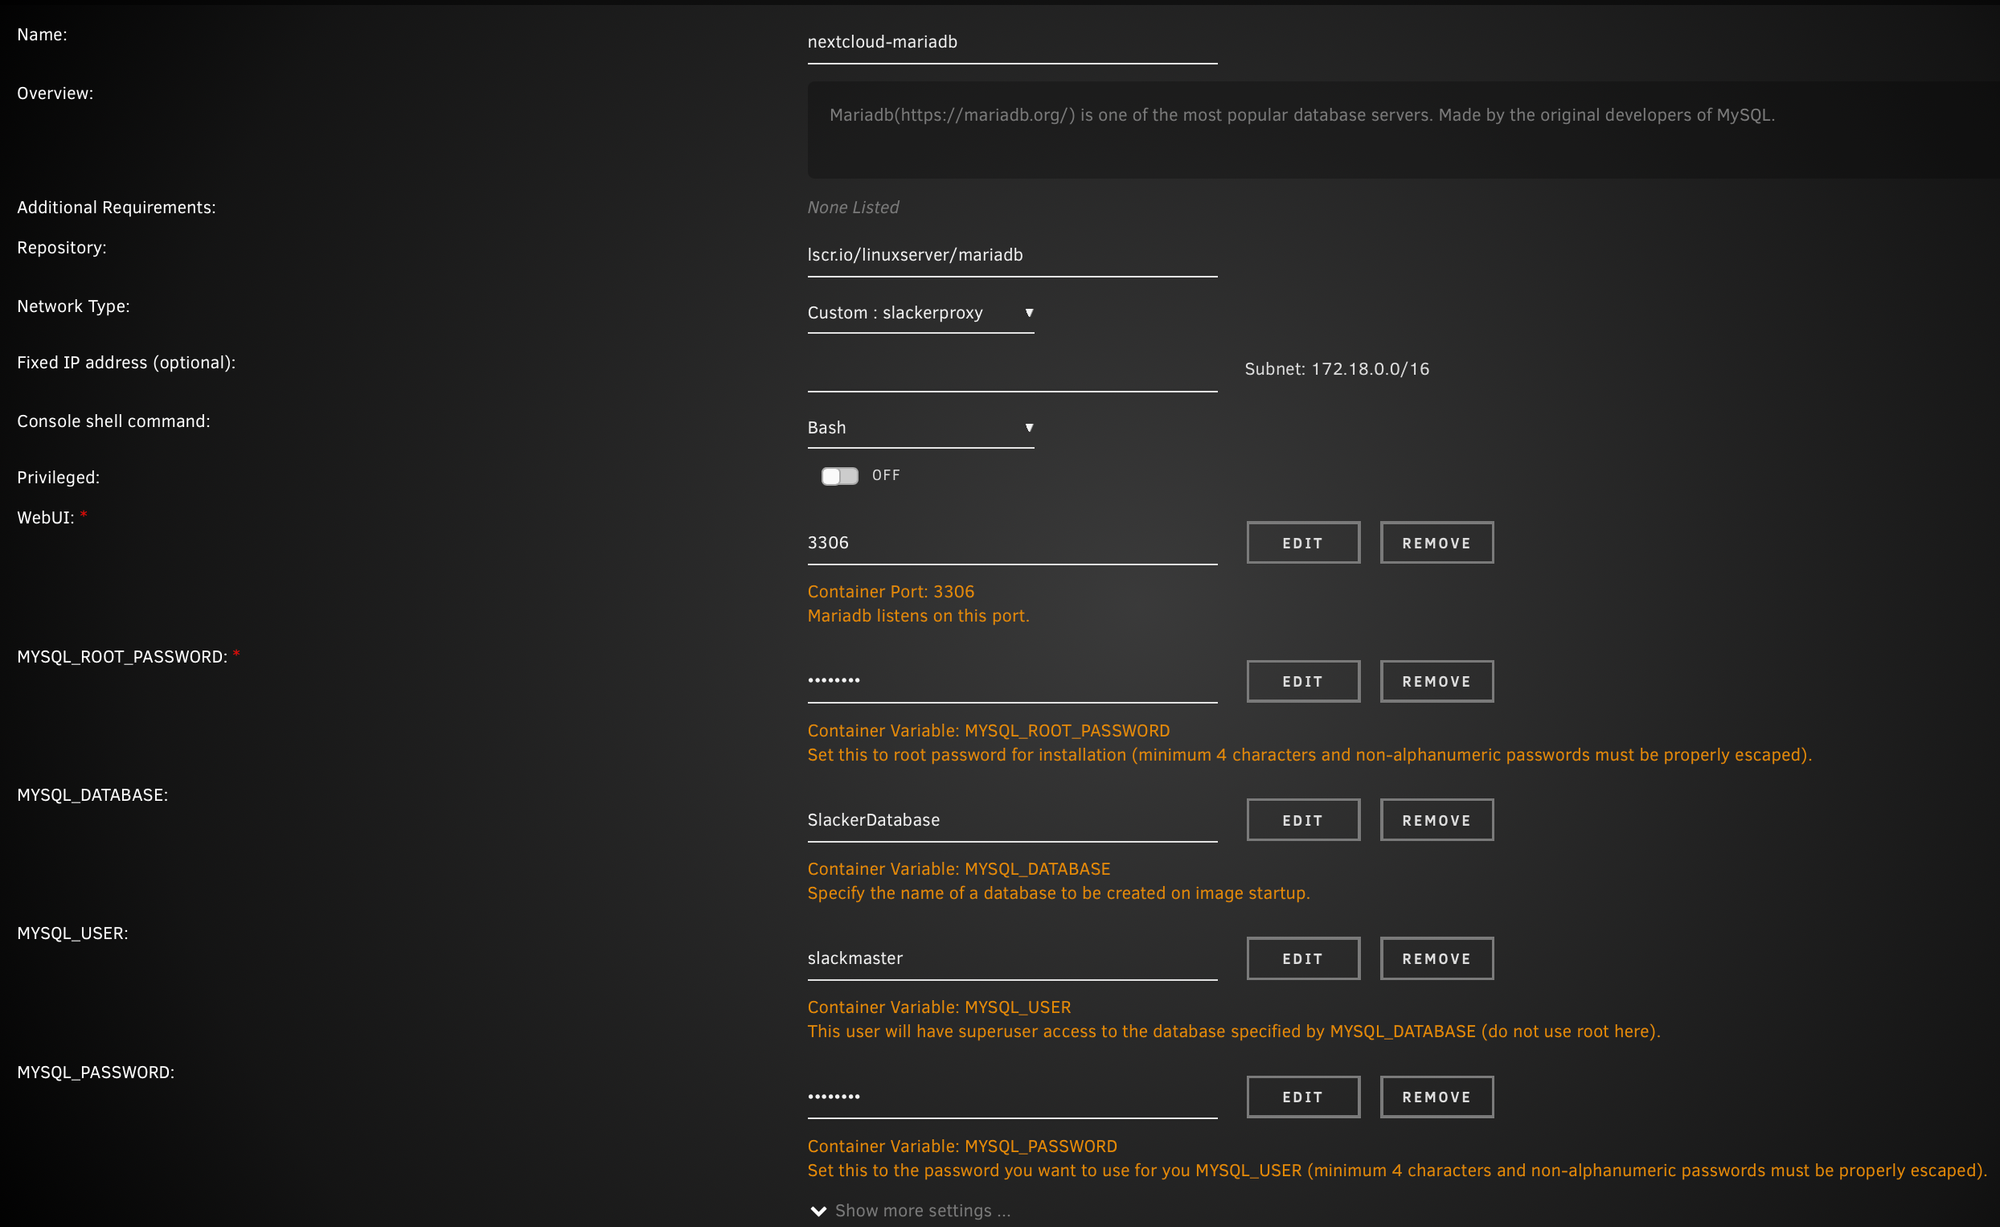
1. Install MariaDB for Nextcloud
MariaDB will act as the database for your Nextcloud. It's important to name this as the Nextcloud instance for clarity. Choose your usernames, passwords, ports, and database names. Remember these details for later use.
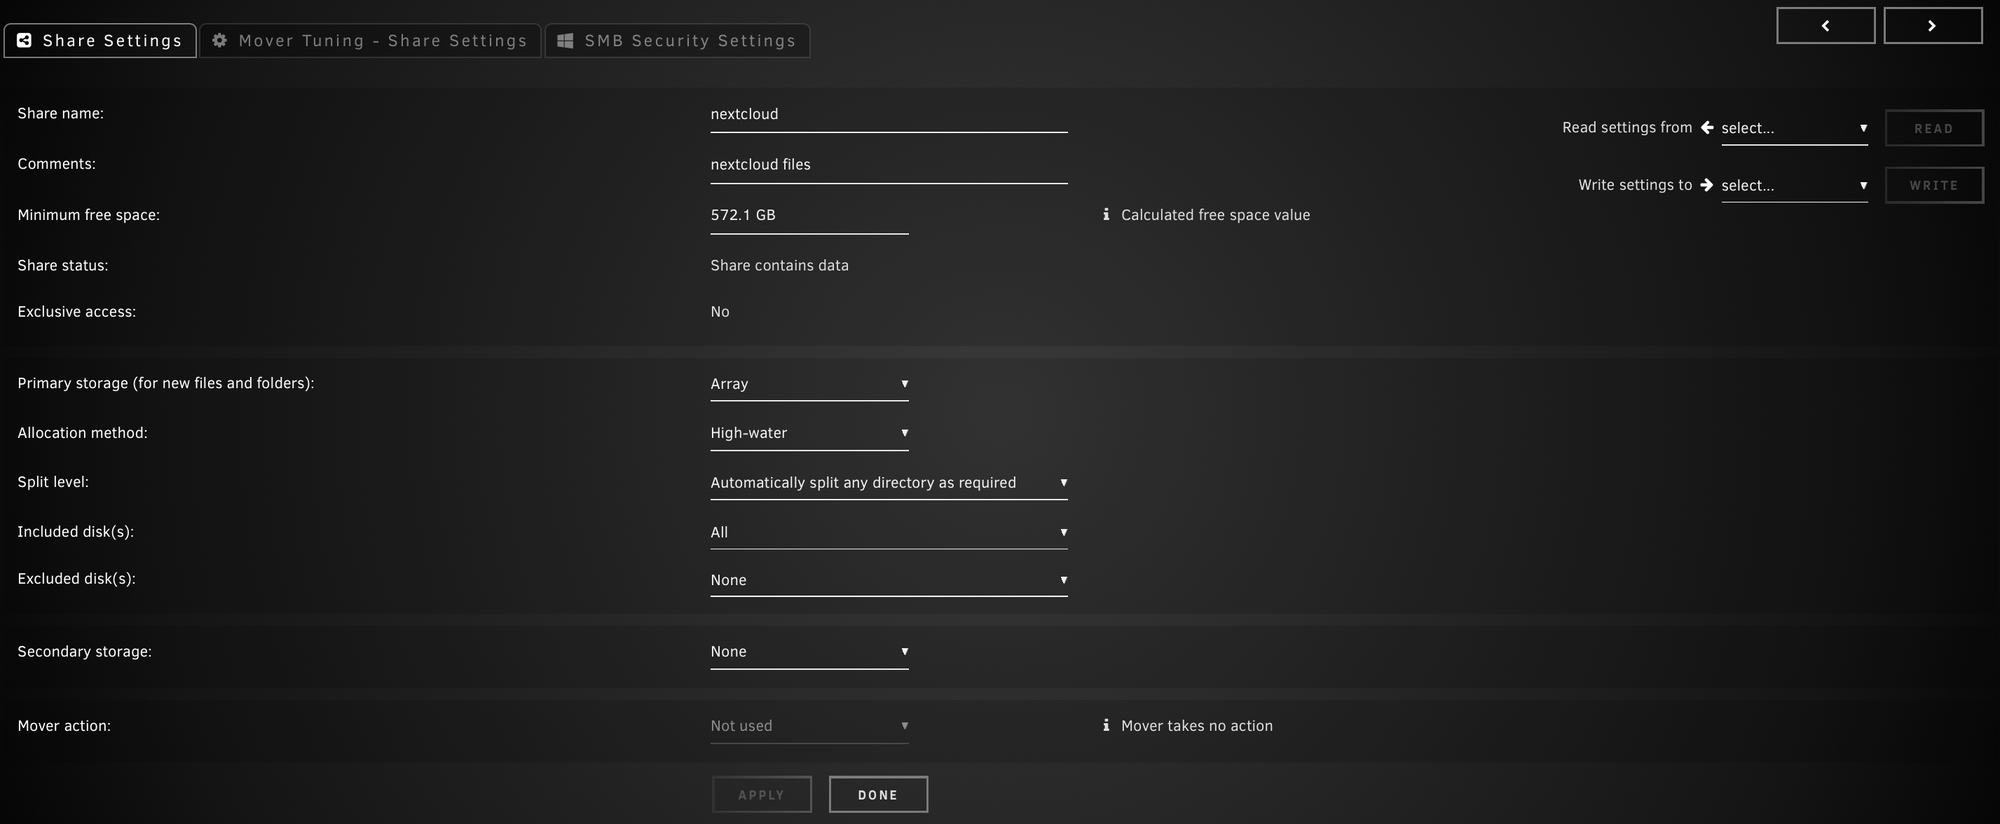
2. Create a Root Directory for Nextcloud
It's crucial to create a separate top-level directory named nextcloud (all lowercase, as Linux is case-sensitive). This prevents permission issues and keeps your main directory clean. Set this directory to save to the array for data protection.
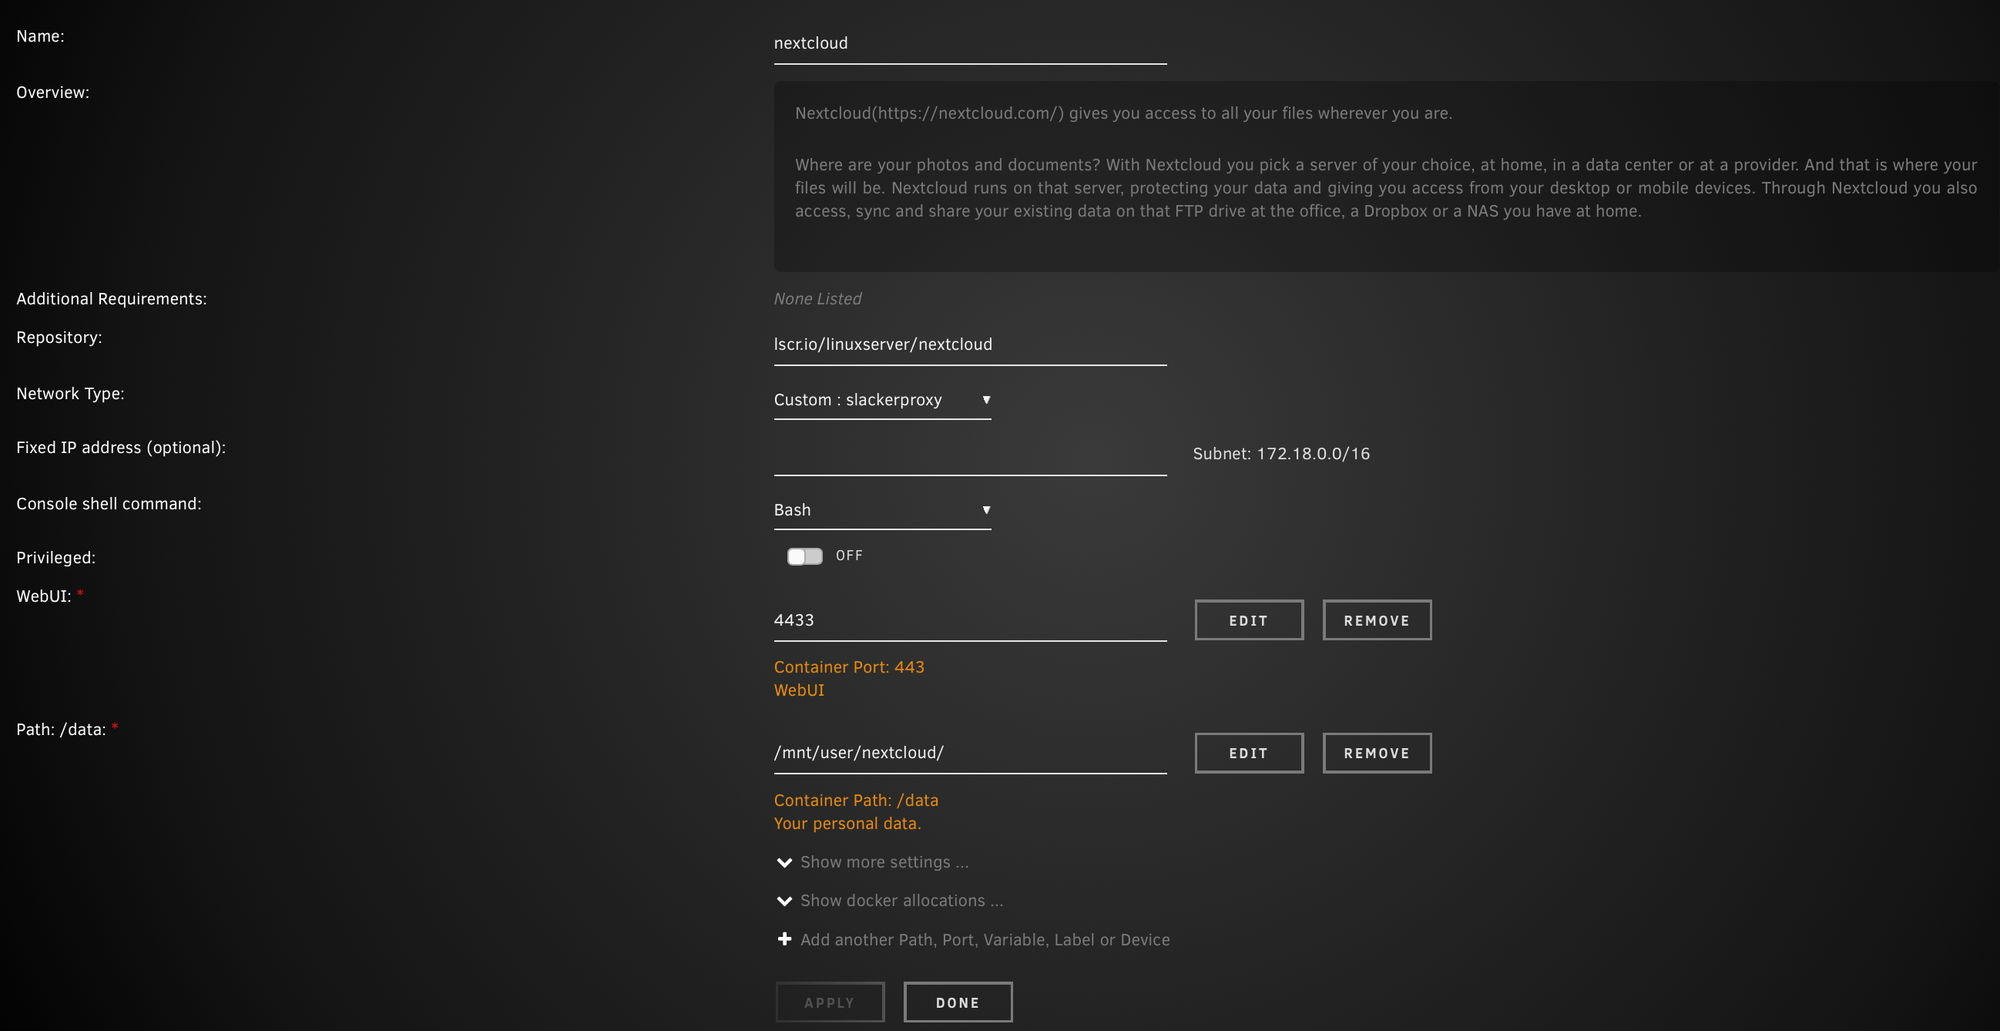
3. Install NextCloud Using Docker
This process is quite straightforward. Ensure that the /data directory of the Docker container points to the newly created nextcloud share.
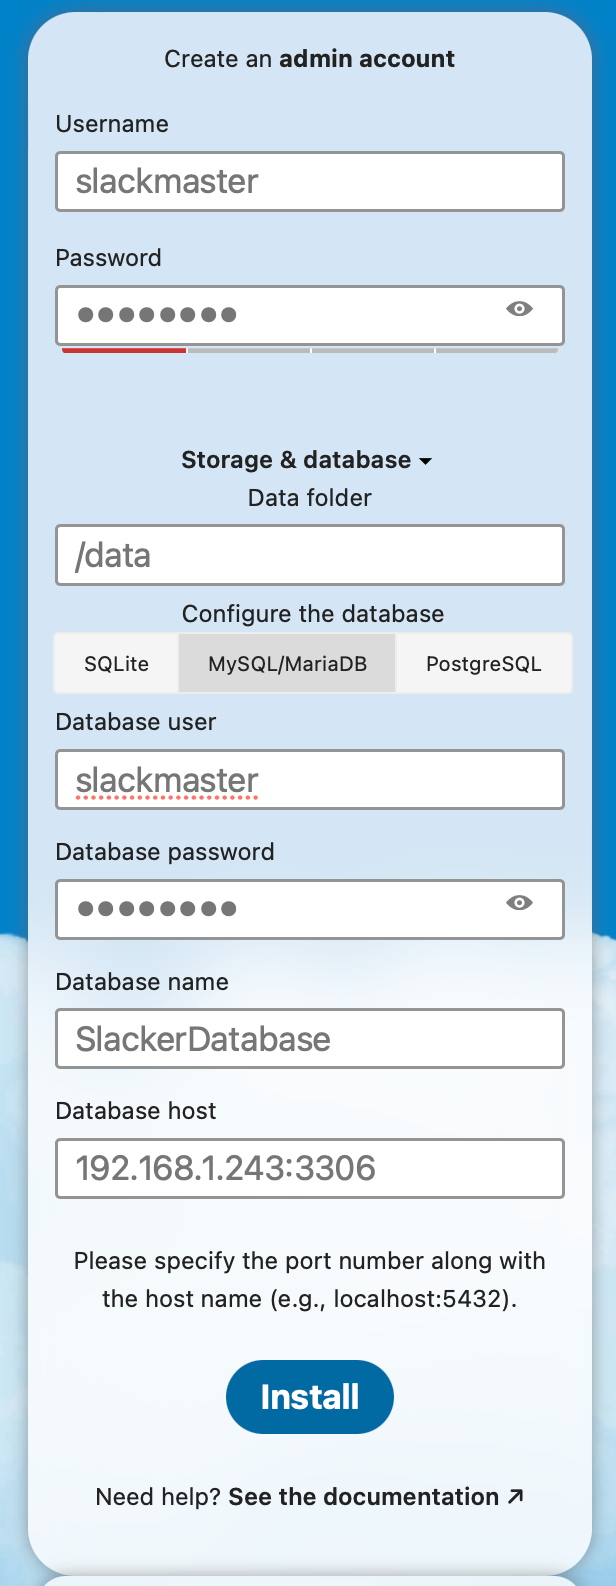
4. Complete the NextCloud Installation
Follow the prompts to finish the installation process.
5. Initial NextCloud Setup
After installing recommended apps, head to the admin section for initial setup. First, enable HSTS (HTTP Strict Transport Security) in CloudFlare under SSL/TLS → Edge Certificates → HSTS Settings.
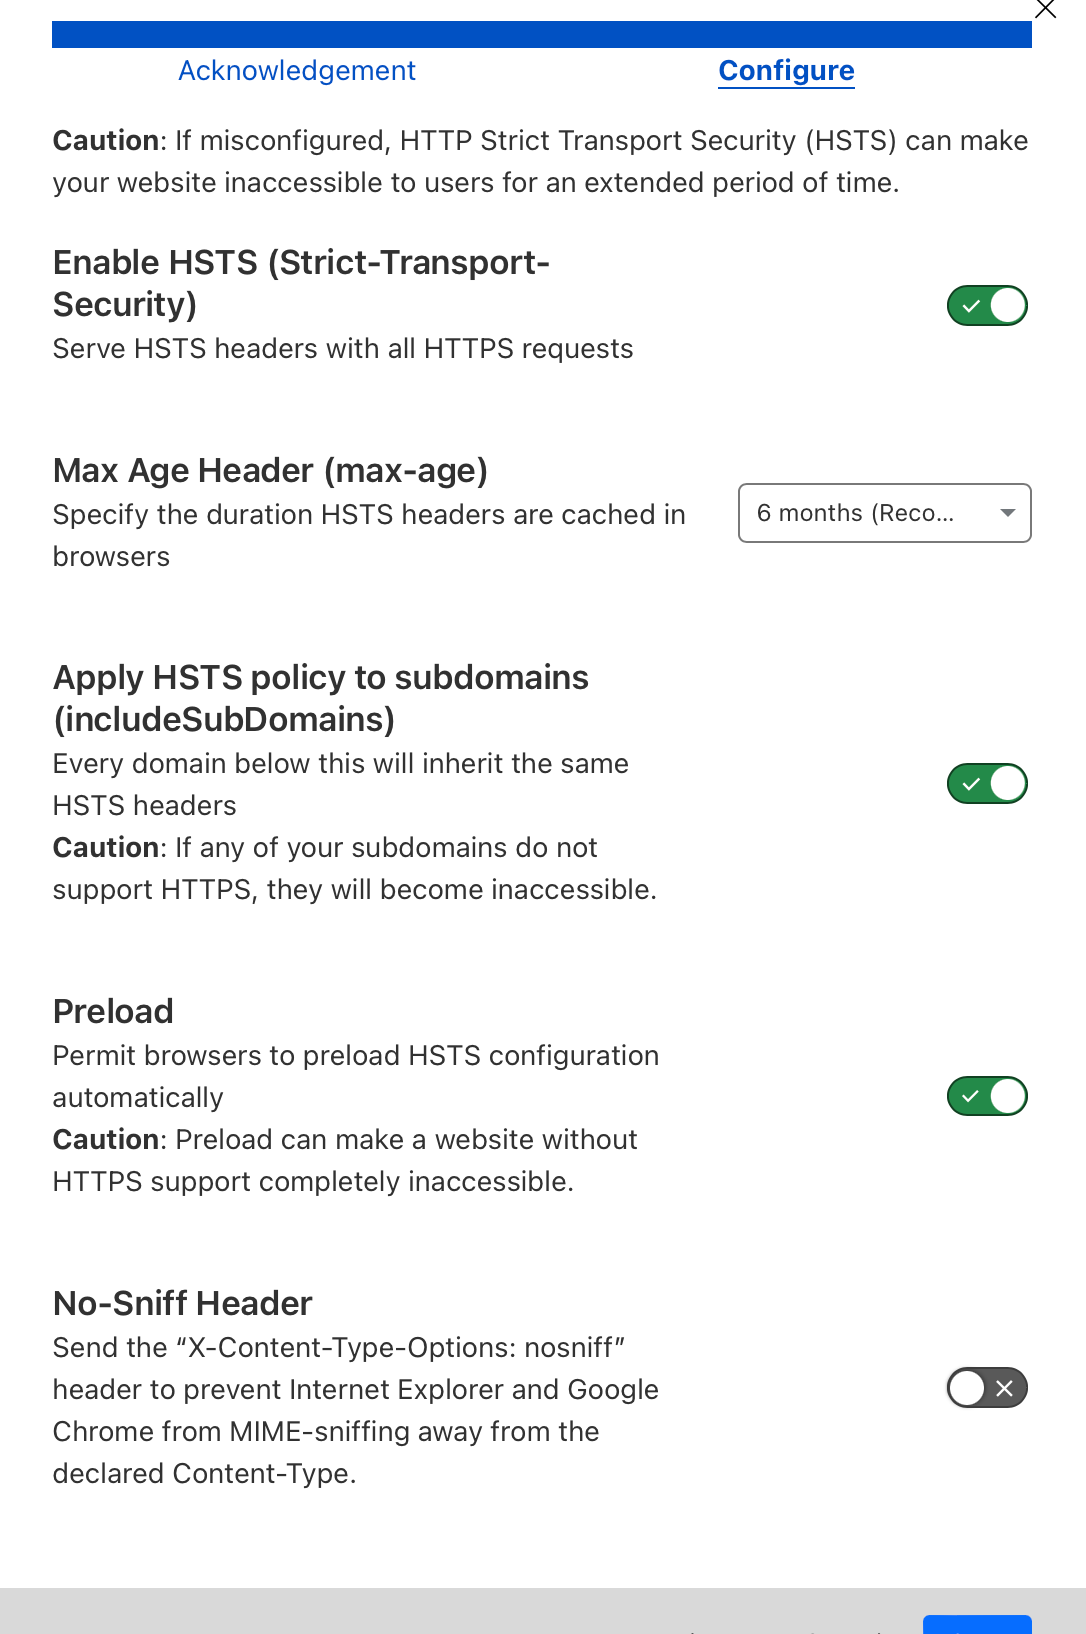
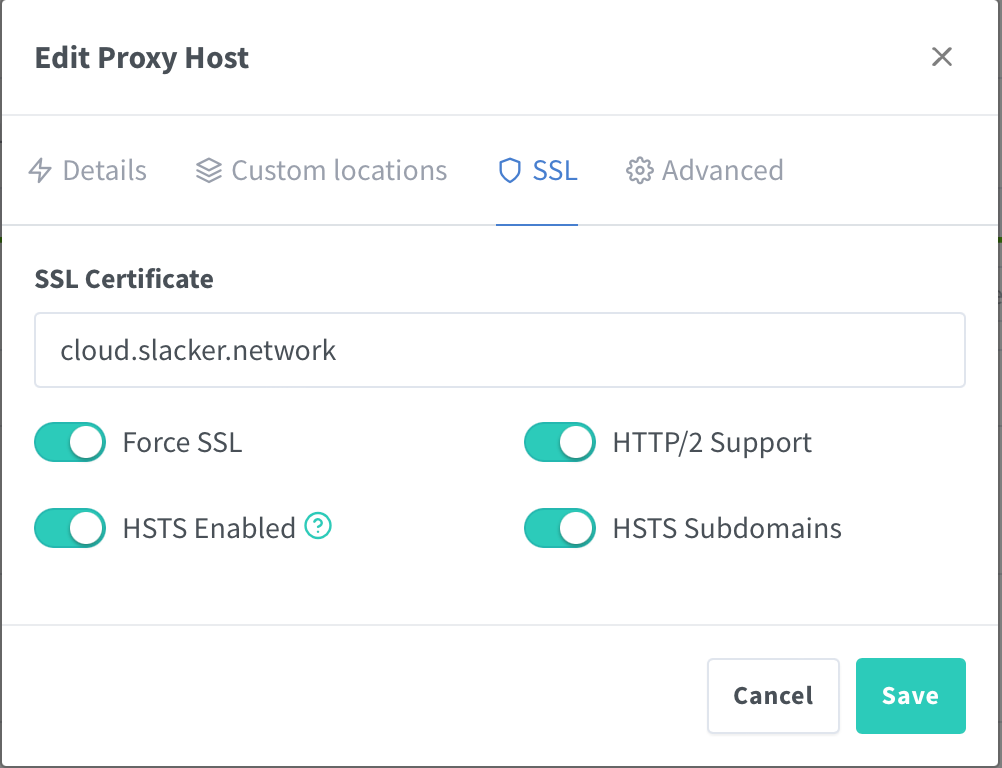
Next, use the NPM manager to redeploy and enable HSTS.
6. Set Trusted Domains and Default Phone Region
Stop the Docker container and navigate to the Nextcloud app data folder. Add your domain to the trusted domains list and set the default phone region (in this example, the US).
Nextcloud appdata folder location:

Code for Trusted Domains:
'trusted_domains' =>
  array (
    0 => '192.168.1.243:4433',
    1 => 'cloud.slacker.network',
  ),
Code for Default Phone Region:
'default_phone_region' => 'US',
That's it! You should have a fully functional NextCloud install now!